The Alpha A5000 is an entry-level mirrorless camera that's aimed at anyone upgrading from a point-and-shoot camera or a smartphone. It goes head-to head with entry-level DSLRs, sporting a similarly-sized sensor and the chance to swap lenses, but unlike most DSLRs at this price point, adds an articulated screen for easy self-portraits and built-in Wifi that supports wireless image transfer, smartphone remote control and downloadable apps. As a mirrorless camera, the A5000 is also a lot smaller and lighter than a DSLR.
Sony Alpha A5000 review
-
-
Written by Ken McMahon
Intro
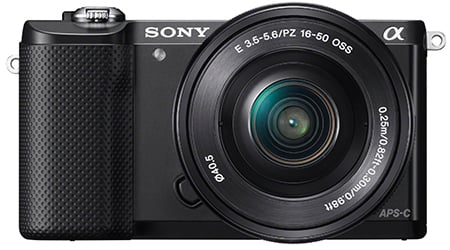
The Sony Alpha A5000 is an upper entry-level mirrorless camera that’s compatible with Sony’s range of E-mount lenses. Announced in January 2014 it’s the successor to the NEX 3N, and becomes the second E-mount camera to abandon the NEX branding in favour of the Alpha name only. It also has the distinction of being, according to Sony, ‘the world’s smallest and lightest interchangeable lens camera to feature the convenience of Wi-Fi connectivity’, though here Sony is restricting the field to cameras with an APS-C sensor. Where last year’s A3000 employed DSLR-styling, the new A5000 unmistakably shares the compact style of earlier NEX models, in particular the 3N which it replaces.
Like all E-mount cameras, the A5000 employs an APS-C sensor with a 1.5x field reduction. The A5000’s sensor shares the same 20.1 Megapixel resolution as the A3000 and like that model supports contrast-based AF only. Like the NEX 3N before it, the A5000 sports an articulated screen which can be angled forward to face the subject for self-portraits and shares the same lever around the shutter release which can operate power zoom lenses. It also offers 1080p video, focus peaking, and built-in Wifi with NFC that supports smartphone remote control and downloadable apps. So despite some confusion remaining over the branding, it’s easiest to think of the A5000 as a NEX 3N with 20 Megapixels and Wifi with NFC.
As an upper entry level model, the A5000 is an obvious choice for upgraders making the move to interchangeable lens photography from smartphones and compacts. As such it’ll come in for stiff competition from entry level DSLRs. In my review I’ve tested it alongside Nikon’s budget D3300 and I’ve also compared it with Canon’s new entry level DSLR, the EOS Rebel T5 / 1200D.
Sony A5000 design and controls
In terms of styling the A5000 is a clear development of the previous NEX line, sharing the slim profile and clean lines of its predecessor. In fact it’s almost exactly the same size as the NEX 3N but just a few millimetres thicker, measuring 110x63x36mm and weighing 269g with battery and card (body only). If you’re considering a DSLR at a similar price point, Nikon’s D3300 body measures 124x98x76mm and weighs 460g and the Canon EOS T5 / 1200D measures 130x100x78mm and weighs 480g with battery and card. So clearly the A5000 is much smaller all round and much lighter too, while sporting the same sized APS-C sensor inside.

The top panel retains the sliding on/off switch mounted on the shutter release but the shape of the panel is different. The dip on the right side is gone and the grip extends forwards with a slight downward slope to a more rounded curve at the front. The playback button is moved to the back panel and there’s now a rounded hump housing the flash. As before the button to activate it is behind it and to the left, positioned for your right thumb on the angled rear section of the top panel. The movie recording button is on the opposite side of this panel where you can press it with your right thumb. It’s flush mounted and requires very positive action which tends to show up on your footage, on the plus side it’s difficult to press accidentally.
On the back panel the 3 inch LCD screen is hinged at the top which means you can flip it not just up for waist-level shooting, but over into a forward-facing position for selfies. The only drawback of the top hinge configuration is the screen can’t be folded down, but you can always turn the camera upside down to hold it over your head.
The screen has a resolution of 460k dots and provides a detailed view, but it suffers badly in bright sunlight and I often found myself in situations where I couldn’t make out very much at all. It has manual brightness control though, and increasing the brightness does help a little. Both the Canon EOS T5 / 1200D and Nikon D3300 have fixed screens. The former shares the A5000’s 460k dot resolution, the latter is more detailed with 921k dots and both are more visible outdoors, but both are also fixed and cant be repositioned or faced forward.
Of course what a DSLR does have that’s missing on an entry-level mirrorless camera like the A5000 is a viewfinder. If the conditions become too bright, or you prefer the privacy or stability of composing with a camera held to your face, then you can simply switch to composing with the viewfinder on a DSLR. Plenty of higher-end mirrorless cameras also sport viewfinders, albeit electronic as oppose to optical, but the A5000 doesn’t have one, and more importantly there’s no means to connect an optional viewfinder accessory. So with the A5000 you’ll be composing with the screen only. Is this a big deal? It will be for some people, but not for others – but it’s certainly a factor you’ll need to consider carefully when choosing a camera at this price point. The A5000 is very compact and affordable, but the trade-off is no built-in viewfinder, nor any means to connect one.

The rear controls on the A5000 have been simplified at the cost of some of the NEX-3Ns customization options. In place of the soft keys there are now labelled single-function buttons for the menu system, playback and help/delete. As before, control wheel cardinal positions are devoted to display overlays, ISO and drive modes, but the bottom position now activates Photo Creativity mode when in Intelligent Auto and Superior Auto modes.
The A5000 has separate compartments for the battery and card, the latter on the left side behind a plastic door that runs the length of the camera body. This is also where the USB and mini HDMI ports are located. The USB port also doubles as an accessory port, supporting options including the VPR1 cabled-remote control.
The battery compartment is conventionally located in the grip and accessed by a door in the camera base. The A5000 takes an NP-FW50 battery with a rating of 1020 mAh which provides enough power for 420 shots under standard CIPA conditions; as an Info Lithium pack, the A5000 can display an accurate percentage remaining on-screen.
The A5000’s battery is recharged in-camera over USB using the supplied AC adaptor, though you can use any other USB adapter you have handy, or simply connect the USB cable to a laptop or vehicle port. Sony offers an optional external AC charger, the BC-TRW.
The ability to top-up or recharge over USB is very useful, but it’s important to point out with full-time Live View composition, mirrorless cameras like the A5000 will typically burn through their battery charge faster than a DSLR which can switch to an optical viewfinder. Indeed Nikon claims 700 shots per charge from the D3300, while Canon claims 500 from the EOS T5 / 1200D; note when either the D3300 or T5 / 1200D are shooting in Live View with their screens though, this figure will drop considerably.
Sony A5000 lens and stabilisation
The Sony A5000 is equipped with an E-mount, which with the camera’s APS-C sized sensor, applies a 1.5x field reduction to all lenses. At the time of writing Sony offered 15 native E-mount lenses (nine zooms and six primes) with focal lengths between 10 and 210mm (15 and 315mm equivalent); note three of the 15 lenses are variations of the popular 18-200mm though. In addition you can mount any of the five native FE lenses designed for the full-frame Alphas without an adapter, although again with the 1.5x crop factor.
Sony A5000 with 16-50mm wide | Sony A5000 with 16-50mm tele |
 |  |
| 16-50mm at 16mm (24mm equiv) | 16-50mm at 50mm (75mm equiv) |
The Alpha A5000 is typically sold in a kit with the SELP1650 16-50mm f3.5-5.6 Power Zoom lens, a retractable design which when powered-down collapses to just over 30mm thick. Combined with a light weight of just 116g, this allows the A5000 to enjoy a compact form factor that’s much more portable than when fitted with the earlier 18-55mm kit zoom. The 16-50mm also offers a more useful equivalent range of 24-75mm: the difference between the telephoto (75mm vs 83mm) end is negligible, but at the wide-end, 24mm captures a noticeably bigger field than 27mm. You can see an example of the coverage above.
As a power zoom, the 16-50mm enjoys motorised control over its focal length using a slider on the side of the barrel or the zoom collar on the A5000’s shutter release. If the camera is set to AF, the single ring on the barrel can alternatively be used to adjust the zoom. If the camera is set to manual focus this ring switches its function to focusing.
Sony A5000 shooting modes
Lacking a mode dial, the Sony A5000’s shooting modes are selected from a menu activated by pressing the centre button on the control wheel. In addition to the PASM modes the virtual mode dial displays two fully auto modes, SCN for the Scene modes, Sweep panorama and Movie mode.
Intelligent Auto employs scene recognition to identify the subject and set an appropriate scene mode. The A5000 can tell if the camera is on a tripod, allowing longer exposure times, or if there’s motion in the frame, in which case it will increase the ISO sensitivity and use a faster shutter speed to arrest the movement. In Superior Auto mode the A5000 takes a burst of images and combines them into a single composite shot with improved dynamic range.
Switch the mode dial to the SCN position and you have the choice of 9 scene modes, though most people will be happy with selecting Intelligent or superior Auto and letting the A5000 choose a screen mode for them. If you prefer to make the choice yourself, the composite Hand-held Twilight and Anti Motion Blur are retained along with the other regulars including Portrait, Sports Action and Sunset.
The D-R menu is where you’ll find the Dynamic Range Optimiser (DRO) and in-camera HDR options, the former available in Auto or set Levels of one to five, and the latter available as Auto or in increments of one to six EV. The HDR mode takes three images at the desired interval and combines them in-camera into a single JPEG file, and you can trigger it with a single shutter press or a self-timer. If you have RAW or RAW+JPEG selected, the HDR options are greyed-out.
You can also access the drive modes via the menu, but a quicker way is to press the right position on the control wheel. As well as self-timer and continuous shooting options, here you’ll find decent auto bracketing for a camera in this class. Continuous 3-frame auto exposure bracketing is provided up to +/- 3EV in 1/3EV intervals. Auto white balance and DRO bracketing are also available.
 |  |  |
 |  |  |
For those who don’t feel ready to venture into PASM territory unguided, pressing the down button on the four-way controller while in Intelligent or Superior Auto mode accesses the Photo Creativity modes. These provide a simple slider interface for adjusting background defocus (depth of field) brightness (exposure) colour (white balance) and vividness (saturation) as well as another route to the Picture Effect filters.
Only some of the Picture Effects are available in the Auto modes, though, if you want the full set you need to set the mode dial to one of the PASM positions and hit the menu button. The full range of effects is wider than previously and includes Toy camera Pop colour, Colour posterisation, Black and white posterisation, Retro photo, Soft high key, Partial colour (Red, Green, Blue, and Yellow), High Contrast mono, Soft focus, HDR painting, Rich tone mono, Miniature, Watercolour, and Illustration.
As they go, some of the effects are pretty cool, and many of them can now be previewed on the screen, so you can see what you’re about to get and there’s no longer any danger of potentially ruining a days shooting by forgetting to turn the feature off when you’ve finished with it. It’s just a shame that Picture effects are disabled in RAW mode so there’s no unfiltered version to fall back on if you decide you don’t like the result.
Above I’ve shown two of the Picture Effects on the A5000 that offer some degree of variation – both the HDR painting and Illustration effects are available in three strength settings – low, medium and high.
Finally, we can’t talk about a Sony camera’s shooting modes without mentioning panoramas. The A5000 features the iSweep panorama feature, which provides several panorama modes including full 360 degree panoramas measuring a maximum 11,520 x 1080. Sony was the first to include panorama features on its compacts and it remains the best. Its panorama modes are versatile, allowing you to shoot in portrait or landscape orientation in either direction and the results are excellent. Here’s an example below.
|

Sony A5000 movie modes
The Sony A5000 supports 1080p movies with full exposure control and allows continuous autofocus using the contrast-detect AF system. Audio is recorded using the built-in stereo microphones. With the A5000 set to AVCHD encoding, you can choose 1080 50i or 60i (depending on region) at 24 or 17 Mbit/s, or 1080 25p / 24p (depending on region), again at 24 or 17 Mbit/s. Switch the A5000 to MP4 encoding and you can choose between 1440×1080 at 12 Mbit/s or VGA at 3 Mbit/s.
You can also apply some but not all of the Picture Effects. Toy Camera, Pop Colour, Posterisation, Retro, High Key, Partial Colour and High Contrast Mono are all available for movies, but the more processor intensive Soft Focus, HDR Painting, Rich Tone Mono, Watercolour, Illustration and Miniature are not allowed. There’s also no slow motion options, but then that’s par for the course for system cameras and DSLRs at the moment.
| |
|---|---|
| |
|
| |
|---|---|
| |
|
| |
|---|---|
| |
|
| |
|---|---|
| |
|
Sony A5000 Wifi
The Sony A5000 has built-in Wifi as well as NFC for fast and painless Wifi connection using a suitably equipped phone. I tested the Wifi on the A5000 with my iPhone 4S. To transfer photos and videos to iOS devices you first need to establish a Wifi connection by selecting the camera’s SSID as an access point and entering the password (if you’re lucky enough to have an NFC-capable phone, you just tap the two devices to initiate the Wifi connection). Then you need to launch the PlayMemories mobile app. Transferring a single image or a batch from the camera is very straightforward, you can either select them on the camera, or on the smartphone app and they transfer pretty smartly, although this will obviously depend on your own particular setup.

You can set the image size to VGA, 2M or original and I found original images took around eight seconds to transfer. When you display the contents of the camera card on an iOS device they’re categorized by date which makes finding what you’re looking for easier than scrolling through a forest of thumbnails. Movie files are displayed as well as stills and AVCHD files are greyed so they can’t be wirelessly transferred, but MP4 transfer is supported. So it’s possible for example to shoot a short movie and upload it to Youtube via your phone.
The A5000 also supports transferring photos and MP4 video to your computer wirelessly with both devices connected to the same access point. To set this up you’ve first got to connect the camera to your computer with a USB cable and register it. The Wifi features are aren’t as sophisticated as some, for example there’s no direct connection to sharing sites and it’s a little disappointing that you can’t use your phone’s GPS to tag images with location data. Having said that, Wifi connectivity is one of the big advantages the A5000 enjoys over the Nikon D3300 and Canon EOS T5 / 1200D.
The A5000 can also be controlled remotely using a smartphone. This requires the free Smart Remote app to be installed on the camera though unusually it isn’t embedded as it is, for example, on the A6000 and the HX400V. So before you can enjoy the pleasures of remote shooting you’ll need to rester on the Playmemories website and download the app to the camera. You can do this either on a computer or directly from the camera. A word of warning though, Sony has done a good joob making the app search and download process simple and straightforward, but it’s still a chore to complete the sign-in username and password using an on screen keyboard. If ever there was a process designed to make you long for a touch-screen it’s this.

With the app installed and the two devices connected over Wifi you’re ready to control the camera and take shots using the PlayMemories app. The functionality of the Playmemories app seems to vary depending on the camera model, but I’m happy to report the the the A5000 supports exposure control and more. So long as the camera’s set to the appropriate mode, you can adjust the aperture, shutter speed, ISO sensitivity and White Balance, along with tapping the live image to move the singe AF area.
So far so similar to the Wifi capabilities of other cameras, but what really sets Sony apart from the rest is being able to connect to the Internet and download apps to extend the capabilities. Sony now offers 15 apps, some free of charge, some costing up to $9.99. There’s also a selection of apps in Beta which are free to download. I believe the API for creating your own apps is now open, but I don’t know of any third party apps, such as support for Twitter or Instagram.
The first step to downloading a new app starts by creating an account on the PlayMemories site at playmemoriescameraapps.com. Once you have an account set up there are two ways to browse and download apps. You either can do it using a free download tool running on your computer with the camera connected over USB, or you can do it direct from the camera itself. If you’re going for the direct approach from the camera, you’ll first need to connect it to the internet via an access point. Manually entering SSIDs and passwords using a non-touchscreen can be laborious to say the least, but once entered the camera can remember them and connect with a click at a later date.
You already know about the pre-installed Smart Remote app. The next app most people will install is the free Direct Upload app, which lets you upload images direct from the camera to various online services. At the time of writing it only supported three services: Sony’s own PlayMemories site (of course), along with Facebook and Flickr, the latter added by installing an additional free app. When uploading to any of the services it’s possible to add a caption, although again it’s a laborious process using the cross keys to enter text on the on-screen keyboard – this would have been so much easier with a touch screen. It all works though and also appears to go direct to the service as opposed to most other manufacturers who share images via their own services. I just wish there were more services available, such as Twitter and Instagram, not to mention a quicker way to enter captions. As it stands, it’s easier and much more flexible to just wirelessly copy an image to your phone, tap out a caption and share it to any service you like.
There’s also a few missed opportunities. The A5000 has pretty average auto exposure bracketing for example, so that’s something an app could improve, and lo-and-behold there’s the Bracket Pro app for $4.99. But inexplicably this doesn’t equip the A5000 with better exposure bracketing. Instead it ignores the chance to improve AEB and instead offers shutter, aperture, focus and flash bracketing. I don’t know about you but I’ve never felt the need to bracket any of those things, and while I’m no fan of HDR myself, I know there are many photographers who would have happily paid for the chance to improve the camera’s AEB capabilities. Bizarrely this was something myself and many other reviewers commented on when Bracket Pro was first introduced over a year ago, yet there’s still no dedicated toolbox app for HDR photographers. Maybe it’s up to third parties to develop one?
So while I love the idea of expanding the capabilities of a camera using downloadable apps, I feel the concept is far from fulfilled on the A5000 and other Sony cameras. Bracket Pro desperately needs deeper AEB, Direct Upload must include at least Twitter and Instagram, and things like Timelapse, Multiple Exposure and Multi Frame NR should arguably already be included on a camera of this class. There should also be an official means to tag images with a GPS log made by your phone.
But again it seems a little churlish to complain about the quality and breadth of downloadable apps on a camera that comes with built-in Wifi, when rival DSLRs don’t even have Wifi to start with.
Sony A5000 Handling and Sensor
The A5000 is a camera that’s ideally suited to compact and smartphone upgraders, in fact in many ways it’s a much easier transition to make than to a DSLR. There’s the compact size, of course, which makes for a much more manageable transition to the world of interchangeable lens photography. The A5000’s control layout bears much more of a resemblance to a compact than that of a DSLR and the absence of a mode dial has less of an impact than you might expect. Pressing the centre button on the control wheel activates a virtual mode dial on the screen which, though not as fast and direct as a physical knob, comes a pretty close second.
While we’re making comparisons with DSLR’s one of the areas in which the A5000 doesn’t score particularly well is customization. The older NEX-3N with it’s customizable soft buttons did much better in this respect. But the redesigned menu system with it’s tabbed pages is a big improvement on the endless scroll system of earlier models.
Unlike the more expensive A6000 which has a hybrid phase / contrast detect AF system, The A5000 is equipped with contrast detect only auto focus. You can choose between 25-area , centre or a moveable ‘flexible’ spot with three sizes. There’s also a tracking option called ‘Focus Lock, which is activated by pressing the central button on the control dial. Focus modes include AF-S (Single-shot AF), AF-C ( Continuous AF), DMF (Direct Manual Focus), and Manual Focus, the latter with the option of peaking.
In practice I found the A5000’s focus in good light was swift and precise. In AF-S mode it’s quick to acquire targets and the 16-50mm lens responds very quickly. In poorer lighting conditions, however, the A5000 is less sure of itself. In the church that I use for high ISO testing it was significantly slower than the Nikon D3300, but it did manage to acquire focus consistently and accurately in AF-S mode with flexible spot AF area mode.
 |  |  |
 |  |  |
The Sony A5000 has an 20.1 Megapixel APS-C sensor that produces images with a maximum size of 5456 x 3632 pixels. Its ISO sensitivity range is from 100 to 16000 ISO. It saves images as JPEG files at one of two quality/compression settings and at the best quality Fine setting image size is on average around 3 to 7MB. It can also save files in Sony’s ARW RAW format.
To see how the quality of the Sony A5000 measures-up in practice, take a look at my Sony A5000 quality and Sony A5000 noise results pages, browse my Sony A5000 sample images, or skip to the chase and head straight for my verdict.